Connecting Ground Wires On A Control Panel

When an individual button or joystick direction stops working properly, we tend to blame the problem on bad wiring or a faulty switch. When several buttons and/or joysticks stop responding, the problem can usually be traced back to faulty ground wiring between these parts. In this post, we will discuss how to connect (or reconnect) the ground wires from your harness or power supply to the various parts on your control panel.
Connecting Ground Wires On A Control Panel
 Ad")
In our post on Getting Familiar With The JAMMA Standard, we talk about a technique of connecting ground wires called daisy chaining. Daisy chaining is a wiring scheme that consists of jumpering a wire off of each connector so that the ground signal will carry over to the next connector. Some harnesses that you can buy will already have the ground wires daisy chained together which make it very easy to connect the ground wires to your control panel parts. For those of you who do not have this luxury, you will have to daisy chain the ground wires together yourself. This will be our main focus for the rest of the post.
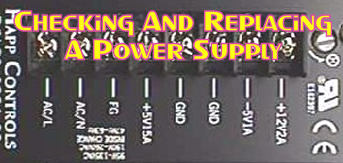
Before we can begin daisy chaining our ground wires, we first have to identify the source of our initial ground wire. Most harnesses (including your standard JAMMA harnesses) have ground wires attached to them that should work for your control panel. Make sure that you look up the pinouts for your specific harness to help you locate the ground wires. DO NOT try to locate the ground wires by the wire color as these colors can vary greatly between harnesses. If you are having trouble locating a ground wire on the harness, you also have the option of connecting a wire to the ground screw or pin on your power supply. Most power supplies (like the one in our video) use the letters GND to indicate which pins or screws are a ground output. It’s a good idea to crimp a terminal on the wire you are going to use as your ground if you are using the power supply as your ground source. We prefer the U-shaped fork terminals over the O-shaped ring terminals as they are easier to remove without having to completely remove the screw from the power supply. Make sure you also invest in a good crimper (preferably ratcheting) so that the wire will not come loose from the terminal. You will need this crimper later when we’re crimping our quick disconnect terminals for our switch wires.
In order to complete the daisy chaining process, we will need some extra wire (preferably the same color as your ground wire) and some female quick disconnect terminals. Quick disconnect terminals come in various colors which usually indicate the gauge of wire that they can hold. The two main colors that we tend to focus on are red (22-18 gauge) and blue (16-14 gauge). We recommend using the blue terminals when wiring a daisy chain as it gives you more room to put both wires in the terminal. Quick disconnect terminals also have a tab width which indicates how large the tab is that you’re trying to connect to. Most arcade game related Cherry switches come in one of two different tab widths: .187 and .250. Make sure that the tab width on the quick disconnect terminals you order matches the tab width on your Cherry switches. It is important to note that you can daisy chain wires together without these terminals by using a soldering iron, however, it makes replacing parts in the future a bit more inconvenient.
Once you have all of the parts that we have discussed, we can begin the daisy chaining process. We like to start this process by beginning with the player one start button; however, the start position does not matter so you can start at a different position if you wish. Take the ground wire coming from your harness (or power supply) and the extra wire that we discussed earlier and strip the ends of the two wires. Place both wires side by side and twist them together. Take the twisted wires and place the stripped ends into one of your female quick disconnect terminals. Using the crimper, firmly crimp the wires so that they will not come loose from the quick disconnect terminal. With the wires crimped, connect the quick disconnect terminal to the proper Cherry switch tab. If you’re not sure which tab is the ground tab on your Cherry switch, it’s usually the one that’s off by itself on the side of the switch. With the first quick disconnect terminal attached, take the extra wire and run it to the closest button to your current position. Measure about an inch or two past this point and then cut the wire at this position. Strip both ends of the wire and then twist the wires together as we did on the first wires in our chain. Place a quick disconnect terminal on to the ends of the wires and crimp it. Now repeat this process until you get to the last button in your chain at which point you will only have one wire crimped inside this quick disconnect terminal.
We receive a lot of questions about control panel parts that all of the sudden have stopped working. Now that you knowing how to connect ground wires properly, you should be able to troubleshoot these types of control panel issues in a more effective and efficient manner. Please leave any questions or suggestions you have in the comments section below.